Was part of the 4 week Winter Internship program of the Texas instruments Center For Embedded Product Design(TICEPD) , Netaji Subhash Institute of Technology (NSIT) . I took part in Track A of the program , where i learnt about various concepts involved in Embedded product Design like working and design of microcontroller systems , concepts like memory management, JTAG ,Clocks , Timer , Comparator, Communication protocols , ADC working and implementation. I also obtained practical experience on PCB designing and Fabrication using EagleCAD for schematic and board file design and Toner transfer method for fabrication.Using the knowledge learned in the above internship , I implemented the following projects -
Project 1 - Framework for MS430
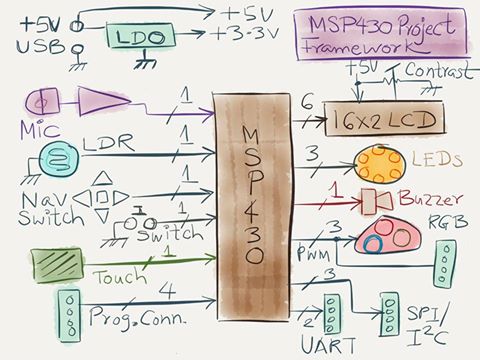
Built a framework for the popular Texas Instruments Ultra Low Power Microcontroller- MSP430 .This framework is like a shield for the microcontroller . This framework provides all major peripherals for any microcontroller at one place so that it becomes easy for a person to build small projects as he has access to the various IO devices and is ideal learning platform for beginners . I have used the TSSOP 28 pin MSP430G25553 as the microcontroller and have following peripherals on the board - Mic , Navigation Switches , LDR , 16*2 LCD Display , Capacitive touch , 6 Charlieplexed Leds , Buzzer , RGB leds (their intensity is controlled using PWM) , Pins for UART , SPI and I2C communcation in addition to the JTAG programming Pins. The board also features a stable power supply due to usage of 3.3V LDO and an amplifier circuit for the analog Mic . The schematic and Board Design was made by me from scratch on Eagle and then I also fabricated the PCB myself using the Tonner Transfer method in the TICEPD(Texas Instruments Center for embedded product Design) lab . After the fabrication , I also individually programmed and tested each of the peripherals . This project served as a great learning Experience for me
Following is a brief Diagrammatic representation of the Framework Design -
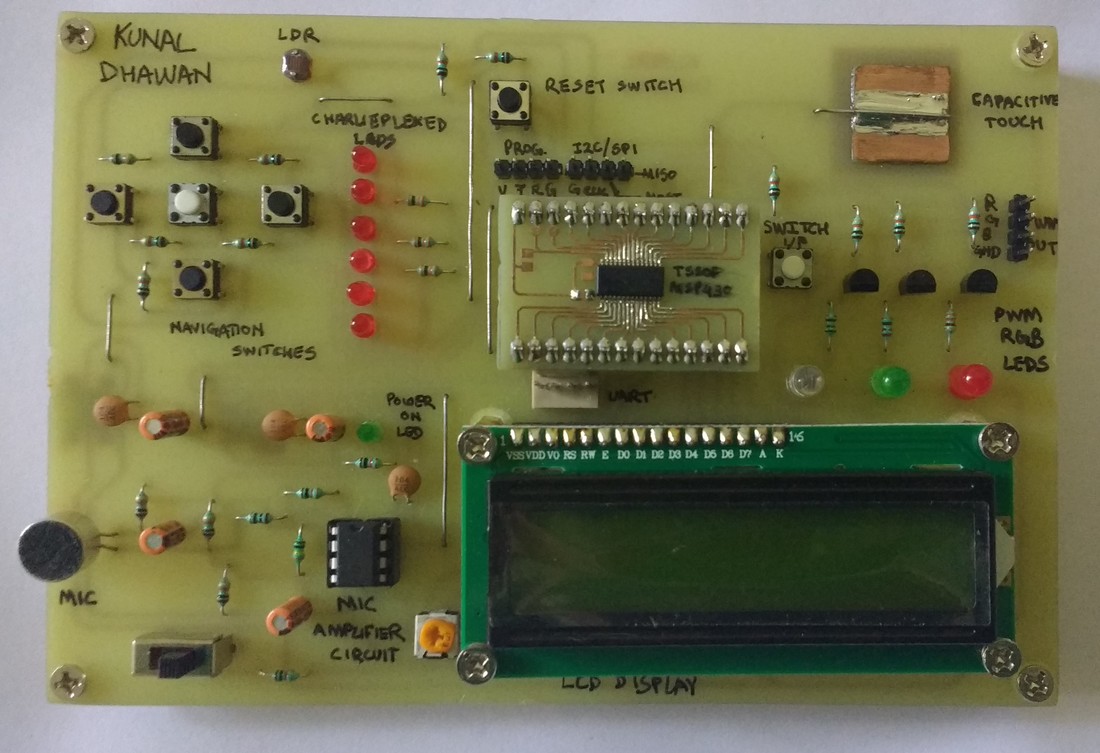
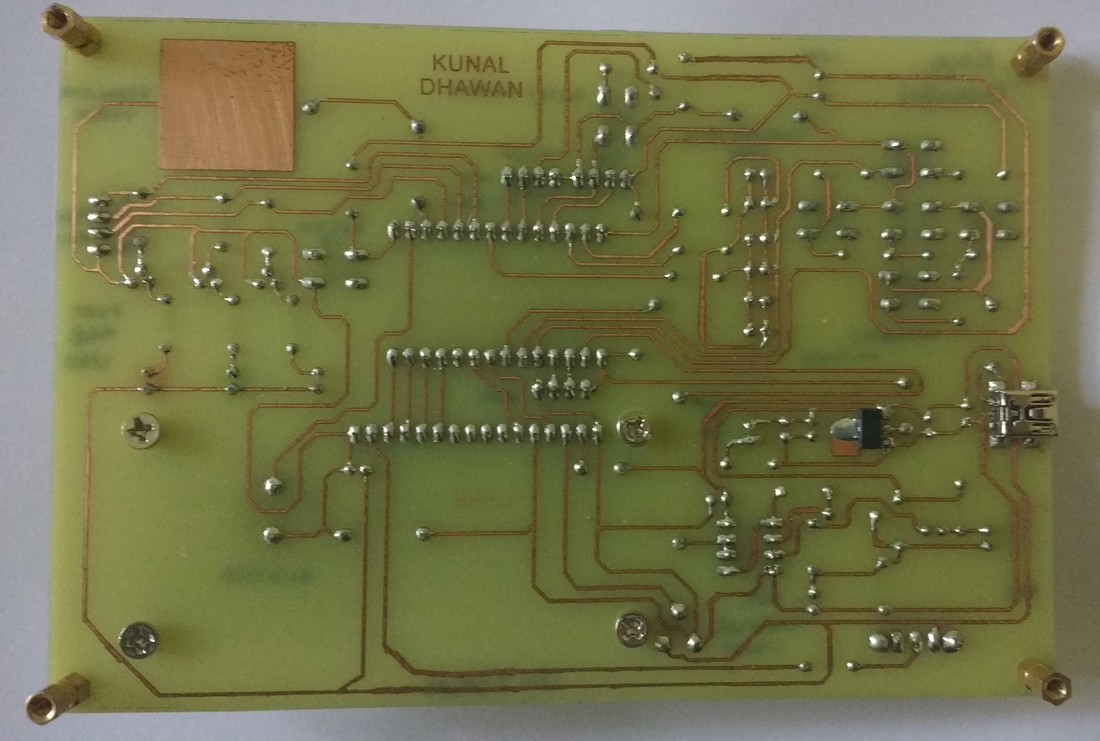
Images of the board fabricated by me -
And now are the snapshots of the schematic and board layout for the above board made on EagleCAD Software -
Project 2 - Analog Colour Mixer
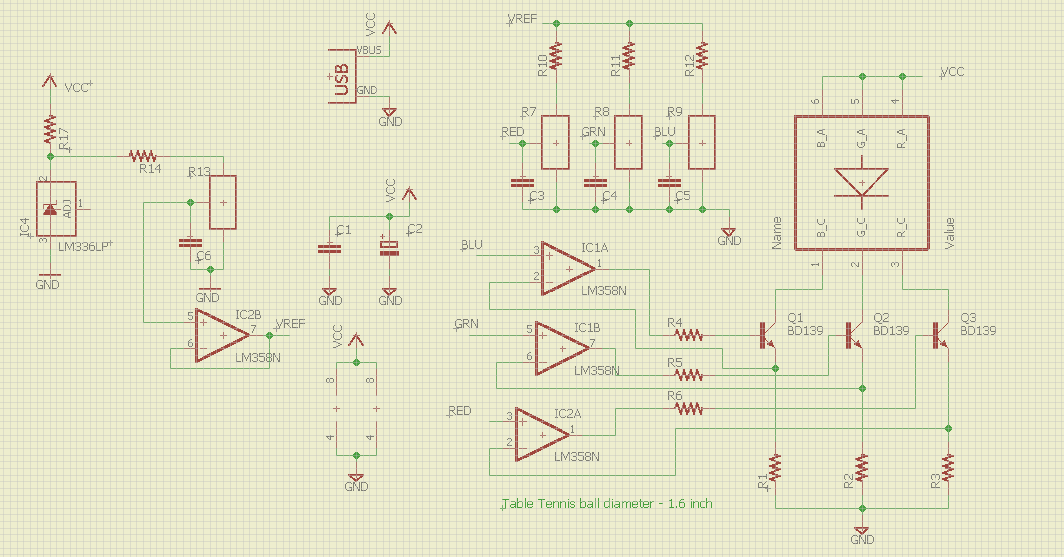
Built a project similar to a product currently flourishing in the market - the Philips Hue LED lightings . But the contrasting point of my project is - that this is a purely analog circuit with no microcontroller to adjust the brightness of the RGB leds by PWM and then mixing them to form the required colour. A simple circuit of BJTS , Leds and a few passive elements have been used to make this project. Following is the schematic of the project -
The next step after figuring out the circuit was to design the board layout . Following the final board layout which was later fabricated (this being my first board , it took me 3 tries before I finalized this Board Layout :P )
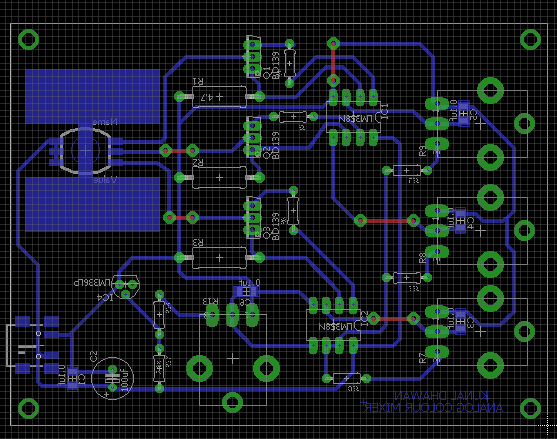
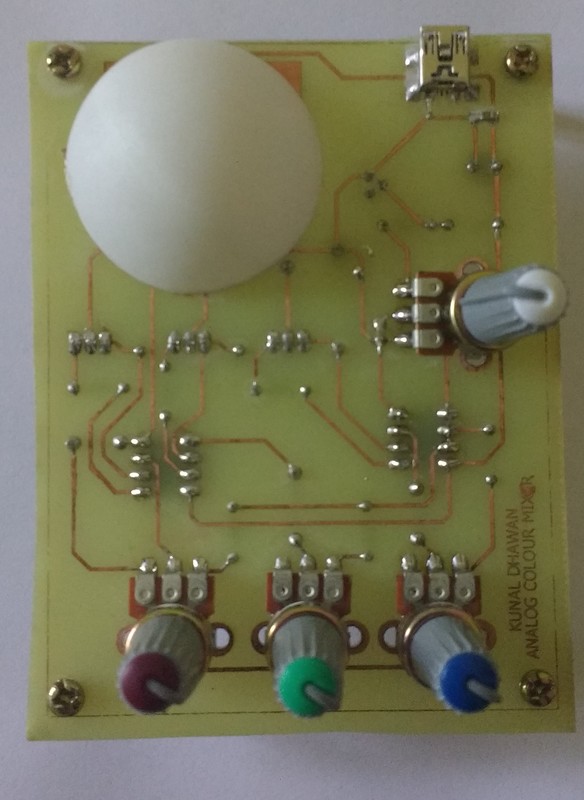
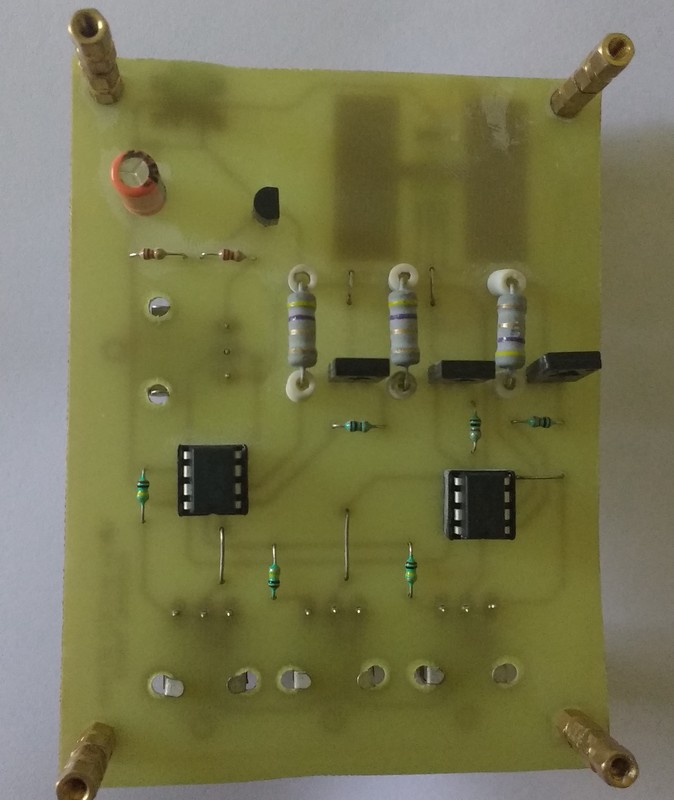
Following are some snaps of the board -

Here is a small video displaying the working of the mixer (Extremely Sorry for bad camera quality) -
